


The Tacoma Build Out
- pugscapesnw
- 5 days ago
- 3 min read
Updated: 4 days ago

Our precious Rositta (2020 Toyota Tacoma) is getting a major outfitting for this trip.
Here is what we did to get her roadtrip ready!
After a lot of debate, we decided to leave the camper at home, and outrig Rositta as our main camping source for this trip. We will stay at campgrounds, parks, friends' houses, friends' yards, Hipcamps and places way out in the middle of nowhere. We have several additions to add before the trip, so stay tuned and we will keep this updated as we make progress.
The Back Seats

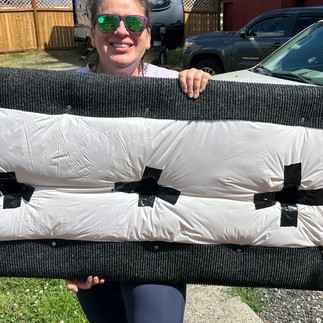

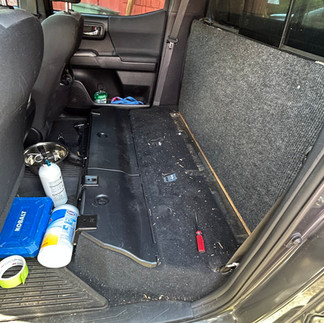


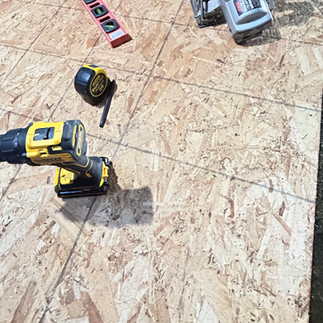
We started by removing the rear seats and creating a flat surface for the whole cab area. This is where Jax and Opie will stay/sleep and where their kennels will attach. We wanted to keep access to the bottom compartments under the seats, so Cori figured out how to get the platform to flip up using the original seat brackets. Once we took the seats off, there was a fair amount of noise coming through, so we insulated the backrest to keep noise, heat, air, etc from getting in/out of the cab. We used a waterheater blanket! It was the perfect size and saved having to deal with insulation. We finished by covering the whole thing in auto carpet. It will provide a nice water barrier for the wood, it looks nice and we can hose it off in necessary.
Cost:
3/4" Plywood 4x8' Board - Free from a client who no longer needed a piece of plywood. Plus a few random pieces we had laying around.
Screws - $3.82 (Lowes)
Carpet -
Waterheater Blanket -
Duct Tape -
Total Cost:
We did discover after the fact, that you can buy a "Seat Delete" and it comes preassembled, with compartments, carpeted and all sorts of cool things. They cost between $400-1000. We decided that if we enjoy this truck-camping-offroading lifestyle, we might invest in one down the road. For now, our ____ will do the trick!
The Sleeping Platform
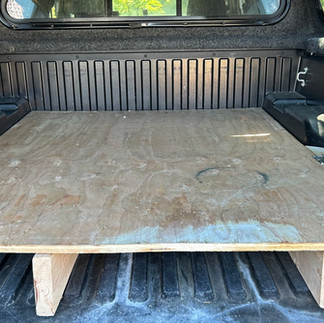
First step in getting a creating to sleep was getting a canopy for the truck bed. After a lot of research, we decided to go for with a SnugTop Rebel installed by SuperHawk Canopy in Marysville, WA. It's a solid canopy and has pet windows that allows air flow without risking escapes. We also added rack rails at the same time. Once the canopy was in place, we began work on the inside.

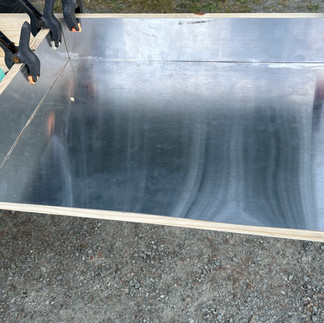
We started with a simple platform on two rails. We used a 3/4" piece of plywood and cut out a rectangle the size of the truck bed. We put the platform on two rails (2x6's) that fit inbetween the slats in the truck bed floor. This created a pretty solid sleeping platform just as is.
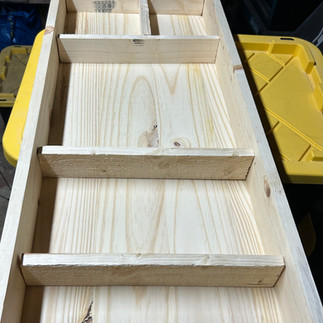
After testing it out a night, we decided to add wings to the sides to cover the space around the wheel wells to keep stuff from falling underneath the platform. Nothing fancy, just two pieces cut out to exact shape and a few brackets to hold it in place.
We covered the whole thing with the same carpet we used on the back seat platform. We will use our backpacking sleeping mats (Brand???) and sleeping bags while traveling with a few extra blankets and pillows to keep it comfy.
There are other options out there, if you would rather purchase a platform for the back. They make cool systems with pull outs. They cost on average $1000+++ and are awesome. We decided we wanted to take the DIY route and build ours.
Cost:
3/4" Plywood Wood -
Screws - $3.82 (Lowes)
Carpet -
2x6x6 Boards x 2
Total Cost:


The Pull Outs
"The Kitchen"


"The Closet"
Comments